How to Use a Telescope: Your First Night
To use a telescope, set it up on firm ground, aim with the finder, then focus on the Moon with your lowest-power eyepiece. Never point a telescope at the sun unless you have a certified solar filter made for that instrument.
On this page (12 sections)
- Set up on firm, level ground
- Start with the lowest-power eyepiece
- Aim with the finder before you look
- Focus on the Moon first
- Step up the power slowly
- Never point a telescope at the sun
- When a phone-guided scope can help
- A tabletop option for a first night
- What to bring on your first night
- Common first-night mistakes
- What your first view will look like
- Next steps to use your telescope well
Using a telescope for the first time takes three steps: set it up on firm ground, aim it at the Moon with the finder, and focus until the image is sharp. The rest is patience.
The Moon is the best first target, because it's bright enough to show you the basics on any clear night. This guide walks through one first night from start to finish, with the one safety rule you must follow.
Set up on firm, level ground
A telescope is only as steady as the ground or table it sits on. Set a tripod on a flat patch of lawn or patio, spread the legs wide and lock them before you attach the scope.
A tabletop Dobsonian needs a sturdy table that won't shake when you touch the focuser. Check that the base has room to swing before you start.
How to use a telescope in a dark backyard
Pick a spot away from porch lights, street lamps and the glow of the house. Clear the area of cords and extra gear so you can walk around the scope without bumping it.
Give your eyes about 20 minutes to adjust before you look.
Your pupils open wider in the dark, so faint details show up. A dim red flashlight keeps that adjustment while you work.
Start with the lowest-power eyepiece
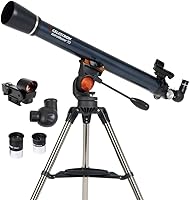
The eyepiece is the lens you look through, and each one sets how much the scope magnifies. A longer eyepiece gives less power and a wider view, while a shorter one gives more power and a smaller view.
Start with the longest eyepiece you have, since it's the easiest to focus and the simplest to aim. Magnification is simple math: the scope's focal length divided by the eyepiece's focal length.
The Heritage 130 has a 650 mm focal length. Its 25 mm eyepiece gives about 26 times power, and its 10 mm eyepiece gives about 65 times.
More power doesn't always give a better view. At high power the image gets dimmer and the air shakes more.
Most first-night views look best at moderate power.
Aim with the finder before you look
The finder is a small second sight on the tube. It helps you point the scope at a target before you look through the eyepiece.
A red dot finder projects a dot onto the sky. Keep both eyes open, move the scope until the dot sits on your target, then check the eyepiece.
Many beginner scopes come with a finder in the box. The Heritage 130 includes a StarPointer finder, so you can aim it on the first night without extra parts.
Focus on the Moon first
The Moon is big, bright and easy to find, so it's the best target for a first night. Aim with the finder, look through the eyepiece and turn the focus knob slowly.
Stop when the edge of the Moon looks sharp. If the image gets softer as you turn, you're going the wrong way, so turn back slowly until it sharpens.
Step up the power slowly
Once the Moon is sharp, switch to a shorter eyepiece and refocus. Each swap moves the focal point, so expect a small focus adjustment every time you change eyepieces.
Move to the planets next. Jupiter and Saturn look like small points at first, but a 130 mm scope can show Jupiter's bands and moons on a steady night.
How to find planets with a telescope covers where to look and when. Use it once the Moon views feel easy.
Never point a telescope at the sun
This rule matters more than any other on this page. Never point a telescope, a finder or a pair of binoculars at the sun unless you have a certified solar filter made for that instrument.
Looking at the sun through an unfiltered optic can cause permanent eye damage in a moment. Don't rely on sunglasses, a dark film or a homemade filter.
Don't set up or aim the scope toward the sun during the day, even for a quick test. Store it capped or indoors until the sun is down.
When a phone-guided scope can help
If finding targets is the hard part, a phone-guided scope takes some of that work away. The StarSense Explorer LT 114AZ uses a phone app to show you where to point it.
Celestron says the app recognizes the sky itself, rather than relying only on the phone's motion sensors. The phone still needs a charge and a clear sky.
Learn the Moon by hand first, even with a guided scope. The app is a helper, not a replacement for knowing where you're looking.
A tabletop option for a first night
The Sky-Watcher Heritage 130 sits on a table, so you can skip the tripod step. Its 130 mm mirror gathers more light than a 90 mm refractor, which helps on planets and bright clusters.
A table scope is quick to start, but it needs a steady table. Keep the base away from the edge of the table so it can move freely.
What to bring on your first night
A red dot finder helps you aim, and a flashlight with a red filter keeps your eyes adjusted. A warm layer and a chair help more than most first-timers expect, since you'll spend a lot of time looking up.
Bring a star chart, either printed or on your phone, and charge the phone before you go out. A small notebook is handy for noting what you saw, so you can find those targets again on the next clear night.
Keep the eyepieces in a case or a pocket, since dew and dust settle on the lenses. Put a cap or a cover over the scope between sessions so it stays clean for the next clear night.
Common first-night mistakes
- Aiming near a porch light or street lamp, which keeps your eyes from adjusting.
- Starting at the highest power you own, which makes a dim view look worse.
- Skipping the eye adjustment time and judging the view too early.
- Setting the scope on a wobbly table or a loose tripod.
- Forgetting the sun rule and leaving the scope aimed toward daylight.
What your first view will look like
The Moon shows craters and sharp shadows along its edge. Planets look like small points or tiny discs, and a few bands or moons may show on a steady night.
Star clusters show many points of light. Galaxies look like faint gray smudges, not the colorful images in photos.
That gap is normal, and it fades once you know what to look for.
Next steps to use your telescope well
Practice on the Moon for a few nights before you try harder targets. Each clear night teaches you the focus, the aim and the view.
When you're ready for planets, how to find planets with a telescope walks through the steps. For a wider list of targets, read what you can see with a telescope.
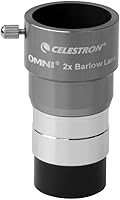
If you're still choosing a scope, how to choose a telescope for beginners explains the trade-offs. The telescope Barlow lens guide covers the add-on that changes the power of any eyepiece.
Frequently asked questions
Do you need experience to use a telescope?
No, the skill comes from a few clear nights of practice. Set the scope on firm ground and aim it at the Moon first.
How long does it take to set up a telescope?
Plan on about half an hour the first time, since you're learning the parts. A tabletop Dobsonian sets up faster than a tripod-mounted scope, and your eyes need about 20 minutes in the dark to adjust before faint objects show up.
Can you look at the sun through a telescope?
Not without a certified solar filter made for that exact instrument. Without one, looking at the sun can cause permanent eye damage, so keep every telescope and pair of binoculars pointed away from the sun, even in daylight.
What should you look at on your first night?
Start with the Moon, since it's bright, large and easy to find. Planets come next, and Jupiter and Saturn show the most detail through a 130 mm scope on a steady, clear night.